


Background
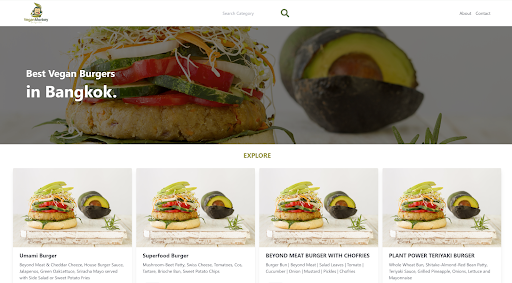
As explained here I’ve moved over to host most Nuxt projects on Vercel. However, it is still possible to host Nuxt projects with Google Firebase, even though you need to jump through some hoops. I will show how we set up our latest Nuxt page (in this case an SEO-front for our Vue-based Vegan Monkey webapp), use it to fetch Firestore data, and deployed to Firebase. The reason we’re creating a new app for SEO-purposes is that Vue is not performing well in terms of SEO (this is a common problem for all client-side rendered sites built on for example Vue, React and Angular), and instead of re-building all the logic we keep the Vue app as is while also building a server-side rendered application as a complement that will funnel users into the dynamic Vue application.
Initialize Firestore in the new app
Below are steps that assume you already have a Firebase project. If not, start by creating one.
Since we already have a project, we just add a new app to the project.
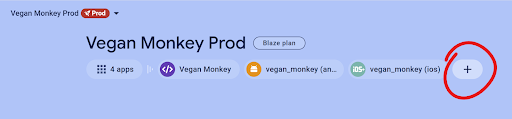
Choose webapp.
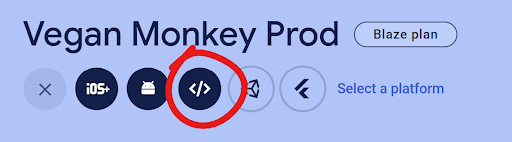
If you want to host this app with Firebase, set up a new site for it in the next step.
You then add the Firebase SDK to the project by running “npm install firebase” in your terminal (adapt depending on your package manager). Latest Firebase version when writing this is 10.8.0.
Run “firebase init” in the terminal and select the features you want. We chose functions (needed for server) and hosting. We don’t need to set up Firestore rules here as we do that via the main web app.
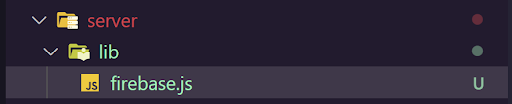
Create a firebase.js (or .ts for TypeScript) file on your server. We created a lib folder for it.
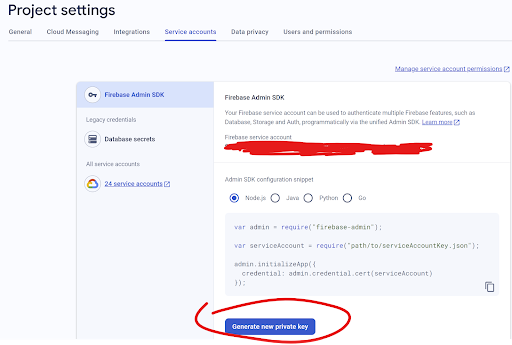
The Firebase UI will give you the client initialization code at this step, but in this case we want the admin SDK, as we’ll be fetching data on the server. Go to “Service accounts” in your project settings and generate a new private key.
Put the downloaded file in your project root. We named it “service-account.json”. In the firebase.js we created earlier, import the Firebase admin modules needed:
// server/lib/firebase.js
import { initializeApp, cert } from "firebase-admin/app";
import { getFirestore } from "firebase-admin/firestore";
import serviceAccount from "@/service-account.json";
We can now initialize Firebase in the same file:
// server/lib/firebase.js
…
// Initialize Firebase
initializeApp({
credential: cert(serviceAccount),
});

//export firestore db
export const firestoreDb = getFirestore();
firestoreDb will now be available in the app for us to fetch data using Firestore admin.
Create an API route
To use firestoreDb as explained above, let’s first create an API route that will be used to fetch data. In the server folder, create an API folder. In this folder, create the routes you need. In this case, we want a route that give me product data from the database based on the country, city and food category. We create a folder structure for this:
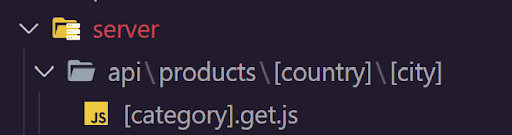
In this file, we import firestoreDb, and then handle any incoming events (simplified logic here that only fetched based on the category, ignoring country and city for now):
// server/api/products/[country]/[city]/[category].get.js

import { firestoreDb } from "@/server/lib/firebase";

export default defineEventHandler(async (event) => {

//get category from the event params
const { country, city, category } = event.context.params;

//fetch products from firestore
const collectionRef = firestoreDb.collection(`products`);
const queryRef = collectionRef.where(
"ProductSubType",
"array-contains",
category
);

const snapshot = await queryRef.get();

if (snapshot.empty) {
console.log("No matching documents.");
return [];
} else {
const products = [];
snapshot.forEach((doc) => {
products.push(doc.data());
});
return products;
}
});
If we spin up the development server (npm run dev) we can now test this endpoint by browsing to an URL that matches it, such as:
localhost:3000/api/products/thailand/bangkok/burger
You should see a json response with the product data:
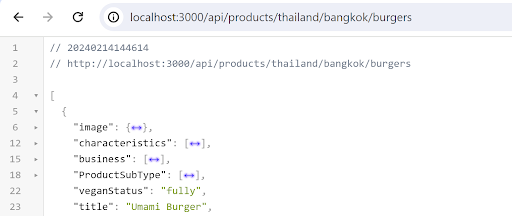
If you want to see .json structured like this in the browser, install the JSON Viewer Chrome extension.
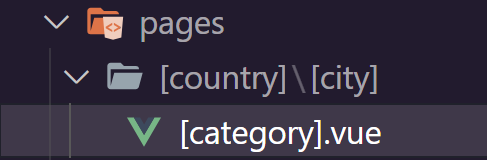
We can now call this endpoint from our front-end. Create a page in the pages folder of your project. Use a route that makes sense for what you want to show. In our case:
In this file, you can call the endpoint:
<script setup>
//initiate route
const route = useRoute();

//get params from url
const { country, city, category } = route.params;

//call the api to get the products
const { data: products } = await useFetch(
  `/api/products/${country}/${city}/${category}`
);
</script>
Now you can use the data in your template:
We plan to create a static site using Nuxt’s functionality for this, but for now, let’s look at how we can deploy the current code base with server-side rendering to Firebase hosting. If you didn’t choose hosting when initiating FIrebase in the project, you can do so now by running “firebase init” again.
Now there are several settings we need to specify to get our site to work on Firebase hosting due to the server-side functionality. It will run as a cloud function that the front-end can call. In your Nuxt config file:
// nuxt.config.ts

export default defineNuxtConfig({
devtools: { enabled: true },
nitro: {
preset: "firebase",
firebase: {
gen: 2,
httpsOptions: {
region: "asia-southeast2",
maxInstances: 3,
},
serverFunctionName: "vmSeoServer",
},
},
});
If you plan to only run one server function, you don’t need to specify a serverFunctionName. Set the httpsOptions according to the region of your project. Use the preset “firebase”, this is needed for the build process. Specify gen:2 if you are using 2nd generation Firebase functions (recommended).
Now, we have to make some changes to the Firebase settings in the firebase.json file that will have been created in project root.
//firebase.json
{
"functions": [
{
"source": ".output/server",
"codebase": "veganmonkey-seo",
"runtime":"nodejs18",
"ignore": [
"node_modules",
".git",
"firebase-debug.log",
"firebase-debug.*.log"
]
}
],
…
}
If you don’t specify a codebase here, you might overwrite functions deployed by your other apps in the same project. You need to set the source of the function to .output/server because this is where the build process will put the server function that we will deploy. If you want to deploy other regular cloud functions from this code base, you can specify several sources specifying an array as the source value.
Since we have several sites in this project, we also need to specify the target for the deployments, so that Firebase knows which site to deploy to:
//firebase.json
{
…
"hosting": {
"site": "veganmonkeyseo",
"public": ".output/public",
"ignore": [
"firebase.json",
"**/.*",
"**/node_modules/**"
],
"cleanUrls": true,
"rewrites": [
{
"source": "**",
"function": "vmSeoServer"
}
]
}
}
The site option needs to match the hosting site you want to deploy to (check in your Firebase dashboard under “Hosting”. The rewrites options must be set to make the requests go via the server function. The public setting will make sure you deploy the build public files to the hosting target. Here you will set your server function name (default is just “server”). CleanUrls will drop the .html from the urls.
Now comes the workaround that will make this whole thing work: you need to run npm install in the server output before deploying for this to work. To make the following steps easier, make sure you have these scripts in your package.json:
// package.json

{
…
"scripts": {
"build": "nuxt build",
"postbuild": "cd .output/server && rimraf node_modules && npm install",
"dev": "nuxt dev",
"generate": "nuxt generate",
"preview": "nuxt preview",
"preinstall": "npx only-allow pnpm",
"postinstall": "nuxt prepare"
},
…
}
This is all standard except the postbuild script. You can do this step manually by cd into the .output directory after building and running npm install, but this script makes it a bit easier. The idea for the solution above comes from this GitHub Nuxt issue.
When you want to deploy, you do these steps in order in the terminal:
- npm run build
- postbuild
- firebase deploy
That’s it!


